Installing Plesk for Windows Using Installer GUI
If you want to select specific Plesk components for installation, you can install Plesk using the graphical interface. Follow these steps to begin:
- Log in to the server via RDP.
- Download Plesk Installer.
- Launch the Windows command prompt. Change the working directory to the one in which you saved the installer binary, then run the following command:
plesk-installer.exe --web-interface
This will launch the installer GUI in your browser.
If you want to install an earlier version of Plesk, run:
plesk-installer.exe --web-interface --all-versions
If you prefer to use the command line for installation, see the Installer Console topic.
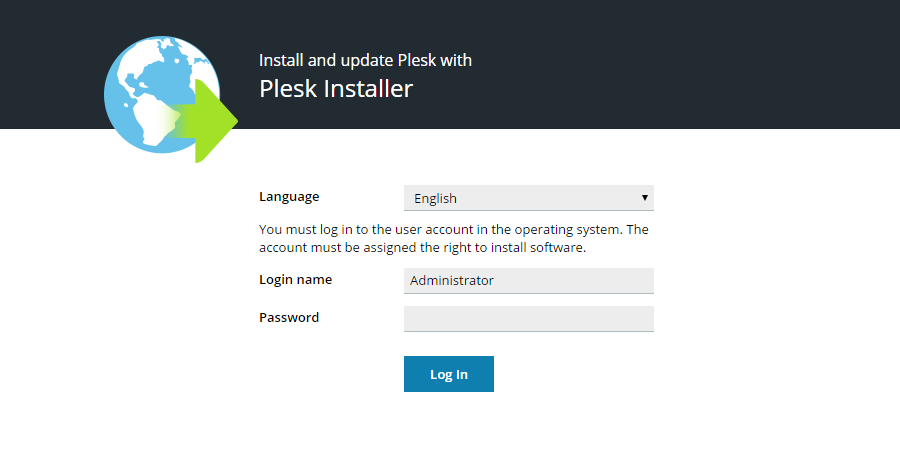
Select the desired interface language and log in with your Windows administrator credentials to proceed. After logging in, you are greeted by the installer GUI welcome screen. Later, you will come here to add, remove, or update Plesk components. However, at the moment, the only available option is to install Plesk.
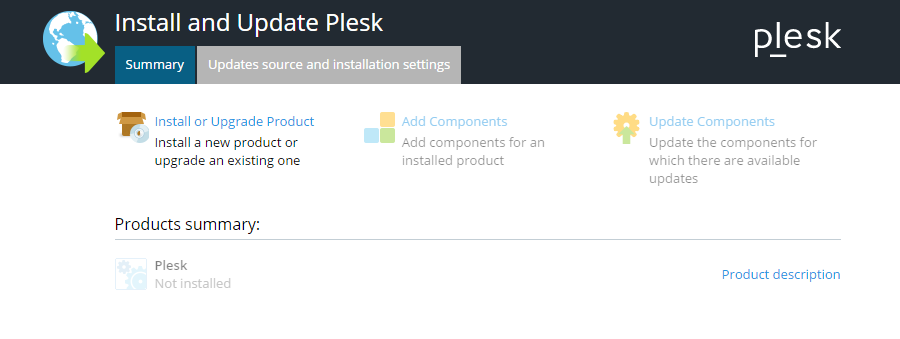
If you want to change installation settings, click Updates source and installation settings.
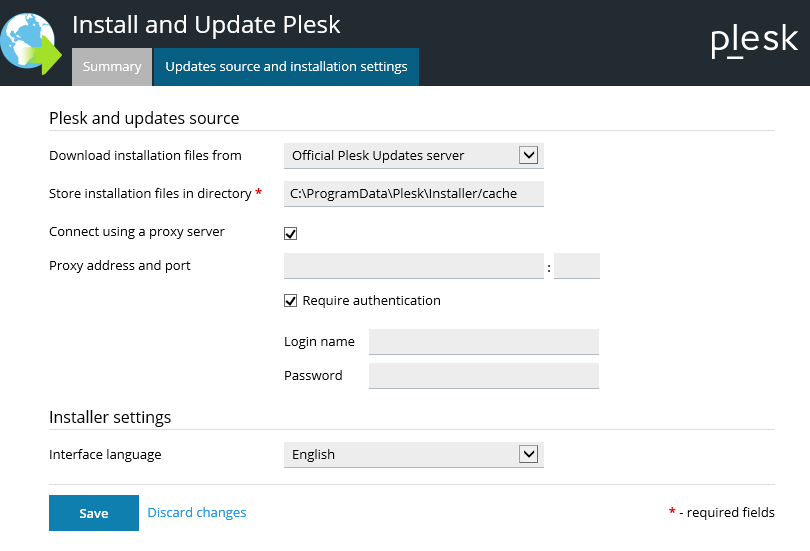
On this screen you can do the following:
- Change the source of the installation files. By default, they are downloaded from Plesk servers. However, you may want to install from a different server (for example, if you have set up a local mirror), or from the local disk (if you have downloaded the installation files beforehand).
- Change the directory to which the installer will download files
(
C:\ParallelsInstaller\parallelsby default). - Configure the HTTP proxy server address and, if required, username and password if the server on which you are installing Plesk is behind one.
- Change the installer interface language.
When you are satisfied with the selected options, click Save to continue.
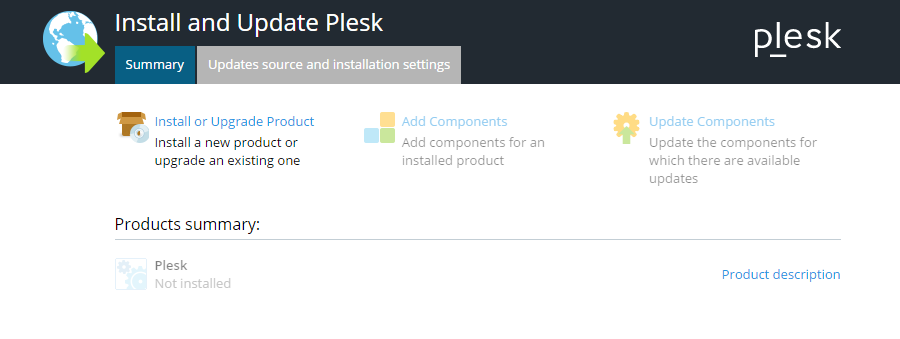
Back on the welcome screen, click Install or Upgrade Product to continue.
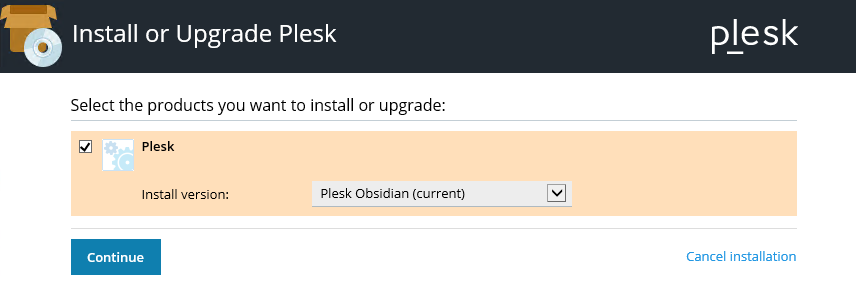
Now, it is time to select the version of Plesk to install. Select the
checkbox next to Plesk, and select the desired product version and
the installation type from the menu. On the screenshot above, you are
about to install the latest stable Plesk version, but if you ran the
installer with the --all-versions option, the
list of available Plesk versions will be different.
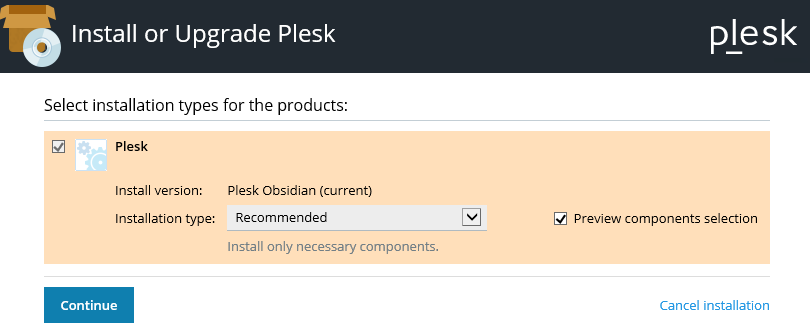
The installation type determines which Plesk components and features will be installed. The following installation types are available:
- The Recommended installation type includes all components necessary for web hosting (including the web server, a mail server, a database server, and so on), plus the most popular and widely used features. If you are unsure what installation type to choose, going with Recommended is a safe bet.
- The Full installation type includes all Plesk components and features. Note that choosing this installation type will require the most disk space.
- The Custom installation type allows you to pick and choose the items to install from the list of all available components and features. This installation type is recommended for experienced Plesk administrators.
Do not worry that you might choose an installation type that is not well-suited for your needs - you will be able to add or remove Plesk components at any time after the installation finishes.
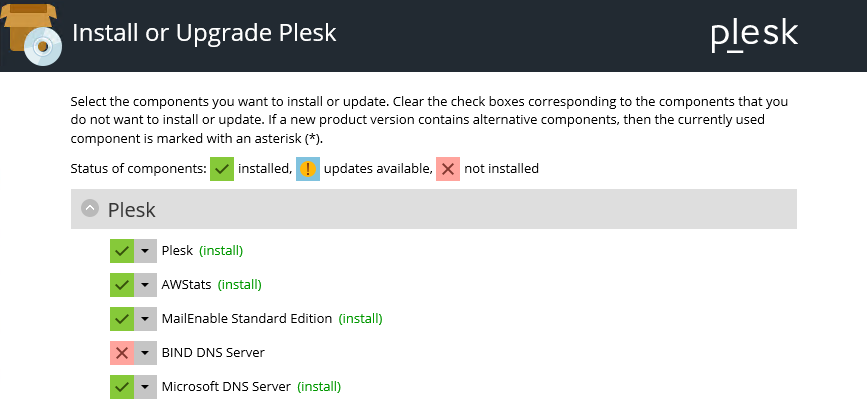
Here is what going with the Custom installation type looks like - mark the components you want to install with the green checkbox icon, select the red cross icon for those you do not need. When you are satisfied with the components you have selected, click Continue to move forward.
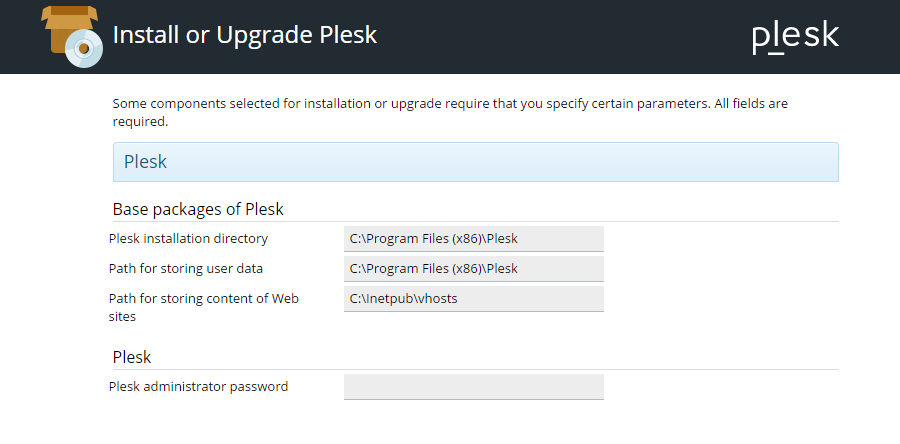
After you have selected the installation type, you may be prompted to configure additional settings, such as the Plesk installation directory, the directory for storing the content of websites hosted in Plesk, and the password for the Plesk “admin” user (you will log in to Plesk using the specified login and password).
After configuring the settings, click Continue to begin the installation.
The installation usually takes between thirty and ninety minutes, depending on the number of components selected for installation, available system resources, and the internet connection speed. After the installation is completed, you will need to perform the post-install configuration - see the Post-Install Configuration topic for details.