Access from iPhone
The instructions provided in this section were verified against iPhone 5s.
To set up a mail account on iPhone:
-
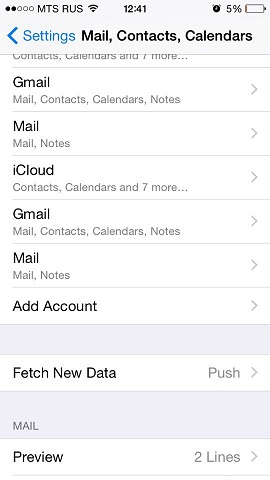
Go to Settings > Mail, Contact, Calendars and select Add Account.
-
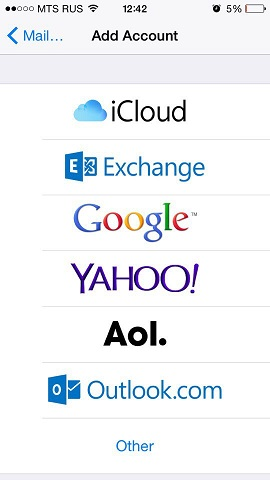
In the displayed list of email providers, select Other. Then tap Add Mail Account.
-
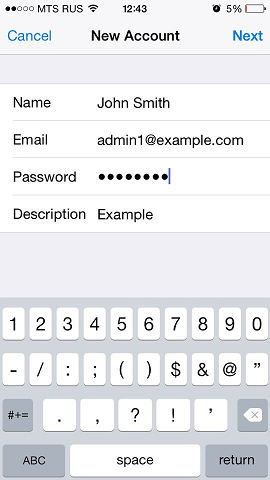
On the New Account screen, enter the following information:
-
Name. Specify the name that will be displayed in your emails.
-
Email. Specify your full email address. Example: admin1@example.com.
-
Password. Specify the password of your email account.
-
Description. Specify account description (optionally).
-
-
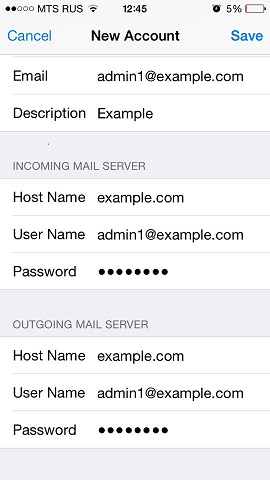
Tap Next. At the top of the next screen select IMAP (if you want to keep copies of received email messages on the server) or POP. Then specify the details of your incoming and outgoing mail servers. For both servers, you should enter the following:
-
Host name. Type in your domain name, for example, example.com.
-
User name. Type in the name of your email account, for example, admin@example.com.
-
Password. The password to your email account (it is optional for outgoing mail server).
-
-
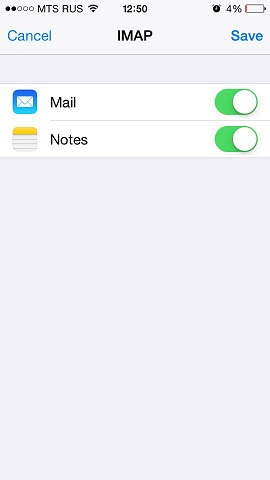
Once the email configuration is added, tap Save to continue. The connection to the specified server will be verified. If the connection is OK, you will see the screen where you can choose what information you want to sync with your phone.
-
When all the information is provided, tap Save to save the entered information. Your iPhone will then verify your account information. Upon successful completion, you will be taken to the Mail screen. Your account will now be listed in the Accounts section.
Note: If you are experiencing any difficulties with syncing your messages, you can manually configure the folders correspondence. To do this, select your newly created account and enter the Advanced section. Here you can choose a mailbox (Drafts, Sent, Deleted, Archive) and select a matching folder on the server. This way your folders will be in sync no matter where or how you access your email.
