Configuring a Smarthost or Relayhost for a Domain
Nota
The terms smarthost and relayhost are usually used interchangeably. We will stick to the term smarthost from here on.
Riassunto
You can configure a smarthost at the domain level in Plesk Obsidian 18.0.76 or later.
In this topic, you will learn the following:
When it is beneficial to use a smarthost.
How to configure a smarthost in Plesk.
You can send emails from Plesk using its local SMTP server. However, some hosting providers block outgoing mail from local SMTP servers. Even when they allow it, email deliverability may be poor and messages can end up in spam. To avoid these issues, configure a smarthost.
A smarthost is a mail server that accepts messages from any sender and forwards them to their final destination. A smarthost acts as an intermediary to improve email deliverability and reduce the chances of messages being marked as spam.
When you send an email through a smarthost, the message appears to originate from the smarthost’s IP address. If the smarthost has a strong sending reputation, your email is more likely to reach the recipient’s inbox instead of being marked as spam. For this reason, we recommend using a reputable SMTP relay service as your smarthost (for example, SendGrid, Mailgun, Mailjet, or similar providers).
Configuring Smarthost for a Domain
You can configure a smarthost for an individual domain. This works in Plesk for Linux with Postfix and Plesk for Windows with either MailEnable or SmarterMail.
To configure a smarthost for a domain:
Choose a reputable SMTP relay service (for example, SendGrid, Mailgun, Mailjet, or similar providers) and create an account there.
Go to Websites & Domains > select a domain > Mail > Smarthost.
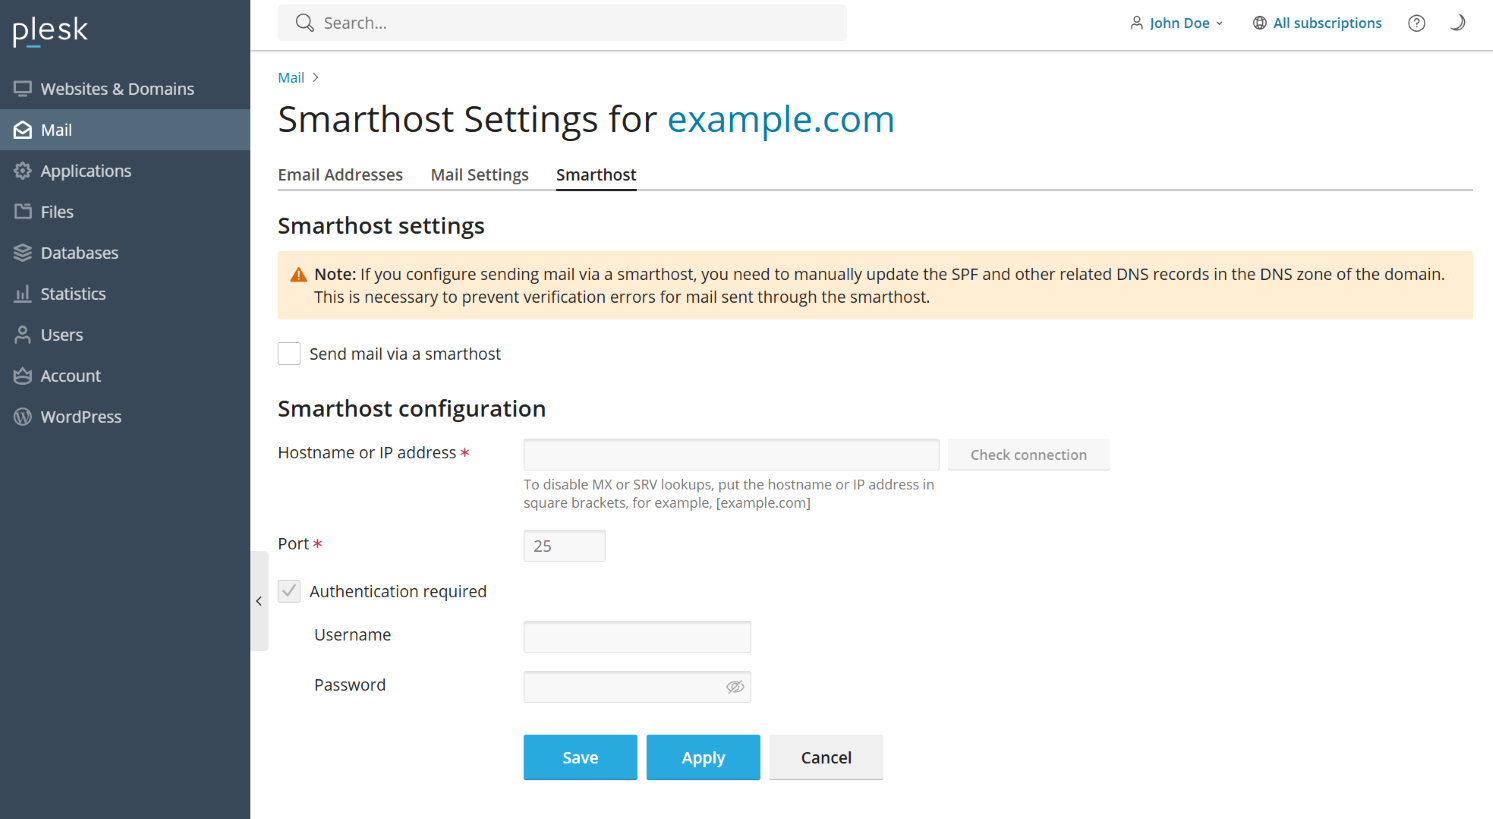
Select the «Send users” mail via a smarthost» checkbox.
-
In the corresponding field, specify the IP address or hostname of a smarthost (for example,
192.0.2.1orsmtp.sendgrid.net).Nota
In Plesk for Linux, you can disable MX or SRV lookups by putting the hostname or IP address in square brackets, for example,
[example.com]. For details, see the Postfix documentation (the section aboutrelayhost). If your SMTP relay service requires SMTP authentication (and most services do), select the «Authentication required» checkbox.
-
If you have selected «Authentication required» during the previous step, specify the credentials to authenticate to your SMTP relay service.
If the service supports basic authentication, specify the username and password in the corresponding fields. If the service supports authentication via API keys, in the «Username» field, specify the default username used for API keys in the service (for example, in SendGrid, the username is
apikey) and, in the «Password» field, specify the API key value. (Optional) You may want to check if the connection to the smarthost can be established. To do so, click Check Connection.
Fare clic su OK.
-
Update the SPF record in the DNS zone of the domain you configured. This ensures the SMTP relay service is authorized to send mail for this domain.
You have configured the smarthost on the Plesk side. However, most commercial SMTP relay services require domain authentication on their side (can also be called domain verification). The following SMTP relay services require it: SendGrid, Mailjet, Mailgun.
Go to your SMTP relay service account and authenticate the domain you just configured smarhost for in Plesk. For exact steps on how to do so, refer to the documentation of your service.
Send a test email to an external email service (for example, Gmail) and make sure that the email has reached the inbox.
You have configured the smarthost both in Plesk and your SMTP relay service. Your smarthost is now up and running.
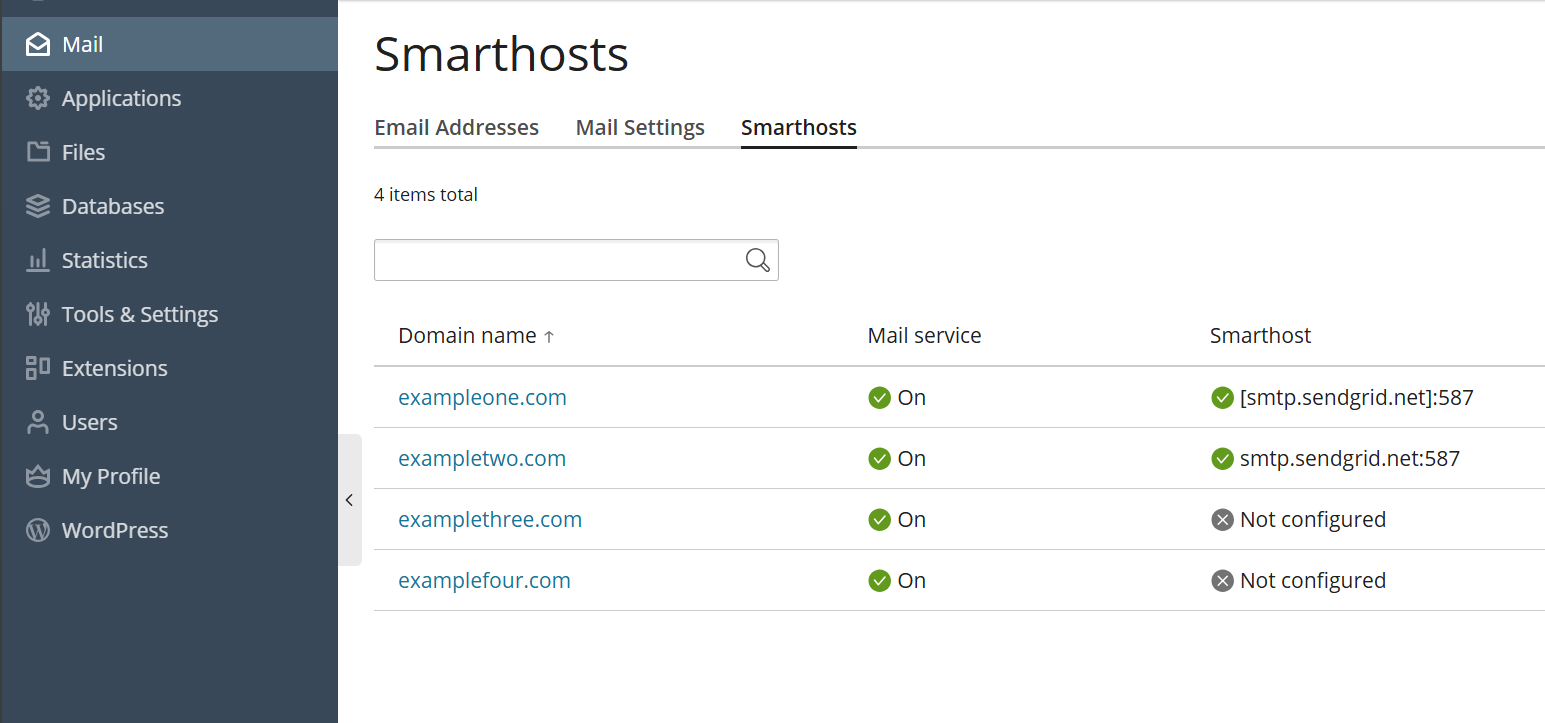
If you want to check which domains have an active smarthost, go to Mail > Smarthosts.